Connecting a mailbox
The mail account form, automatic settings detection, connection test, sync priority and the first message fetch.
Updated 02.09.2026
Table of contents
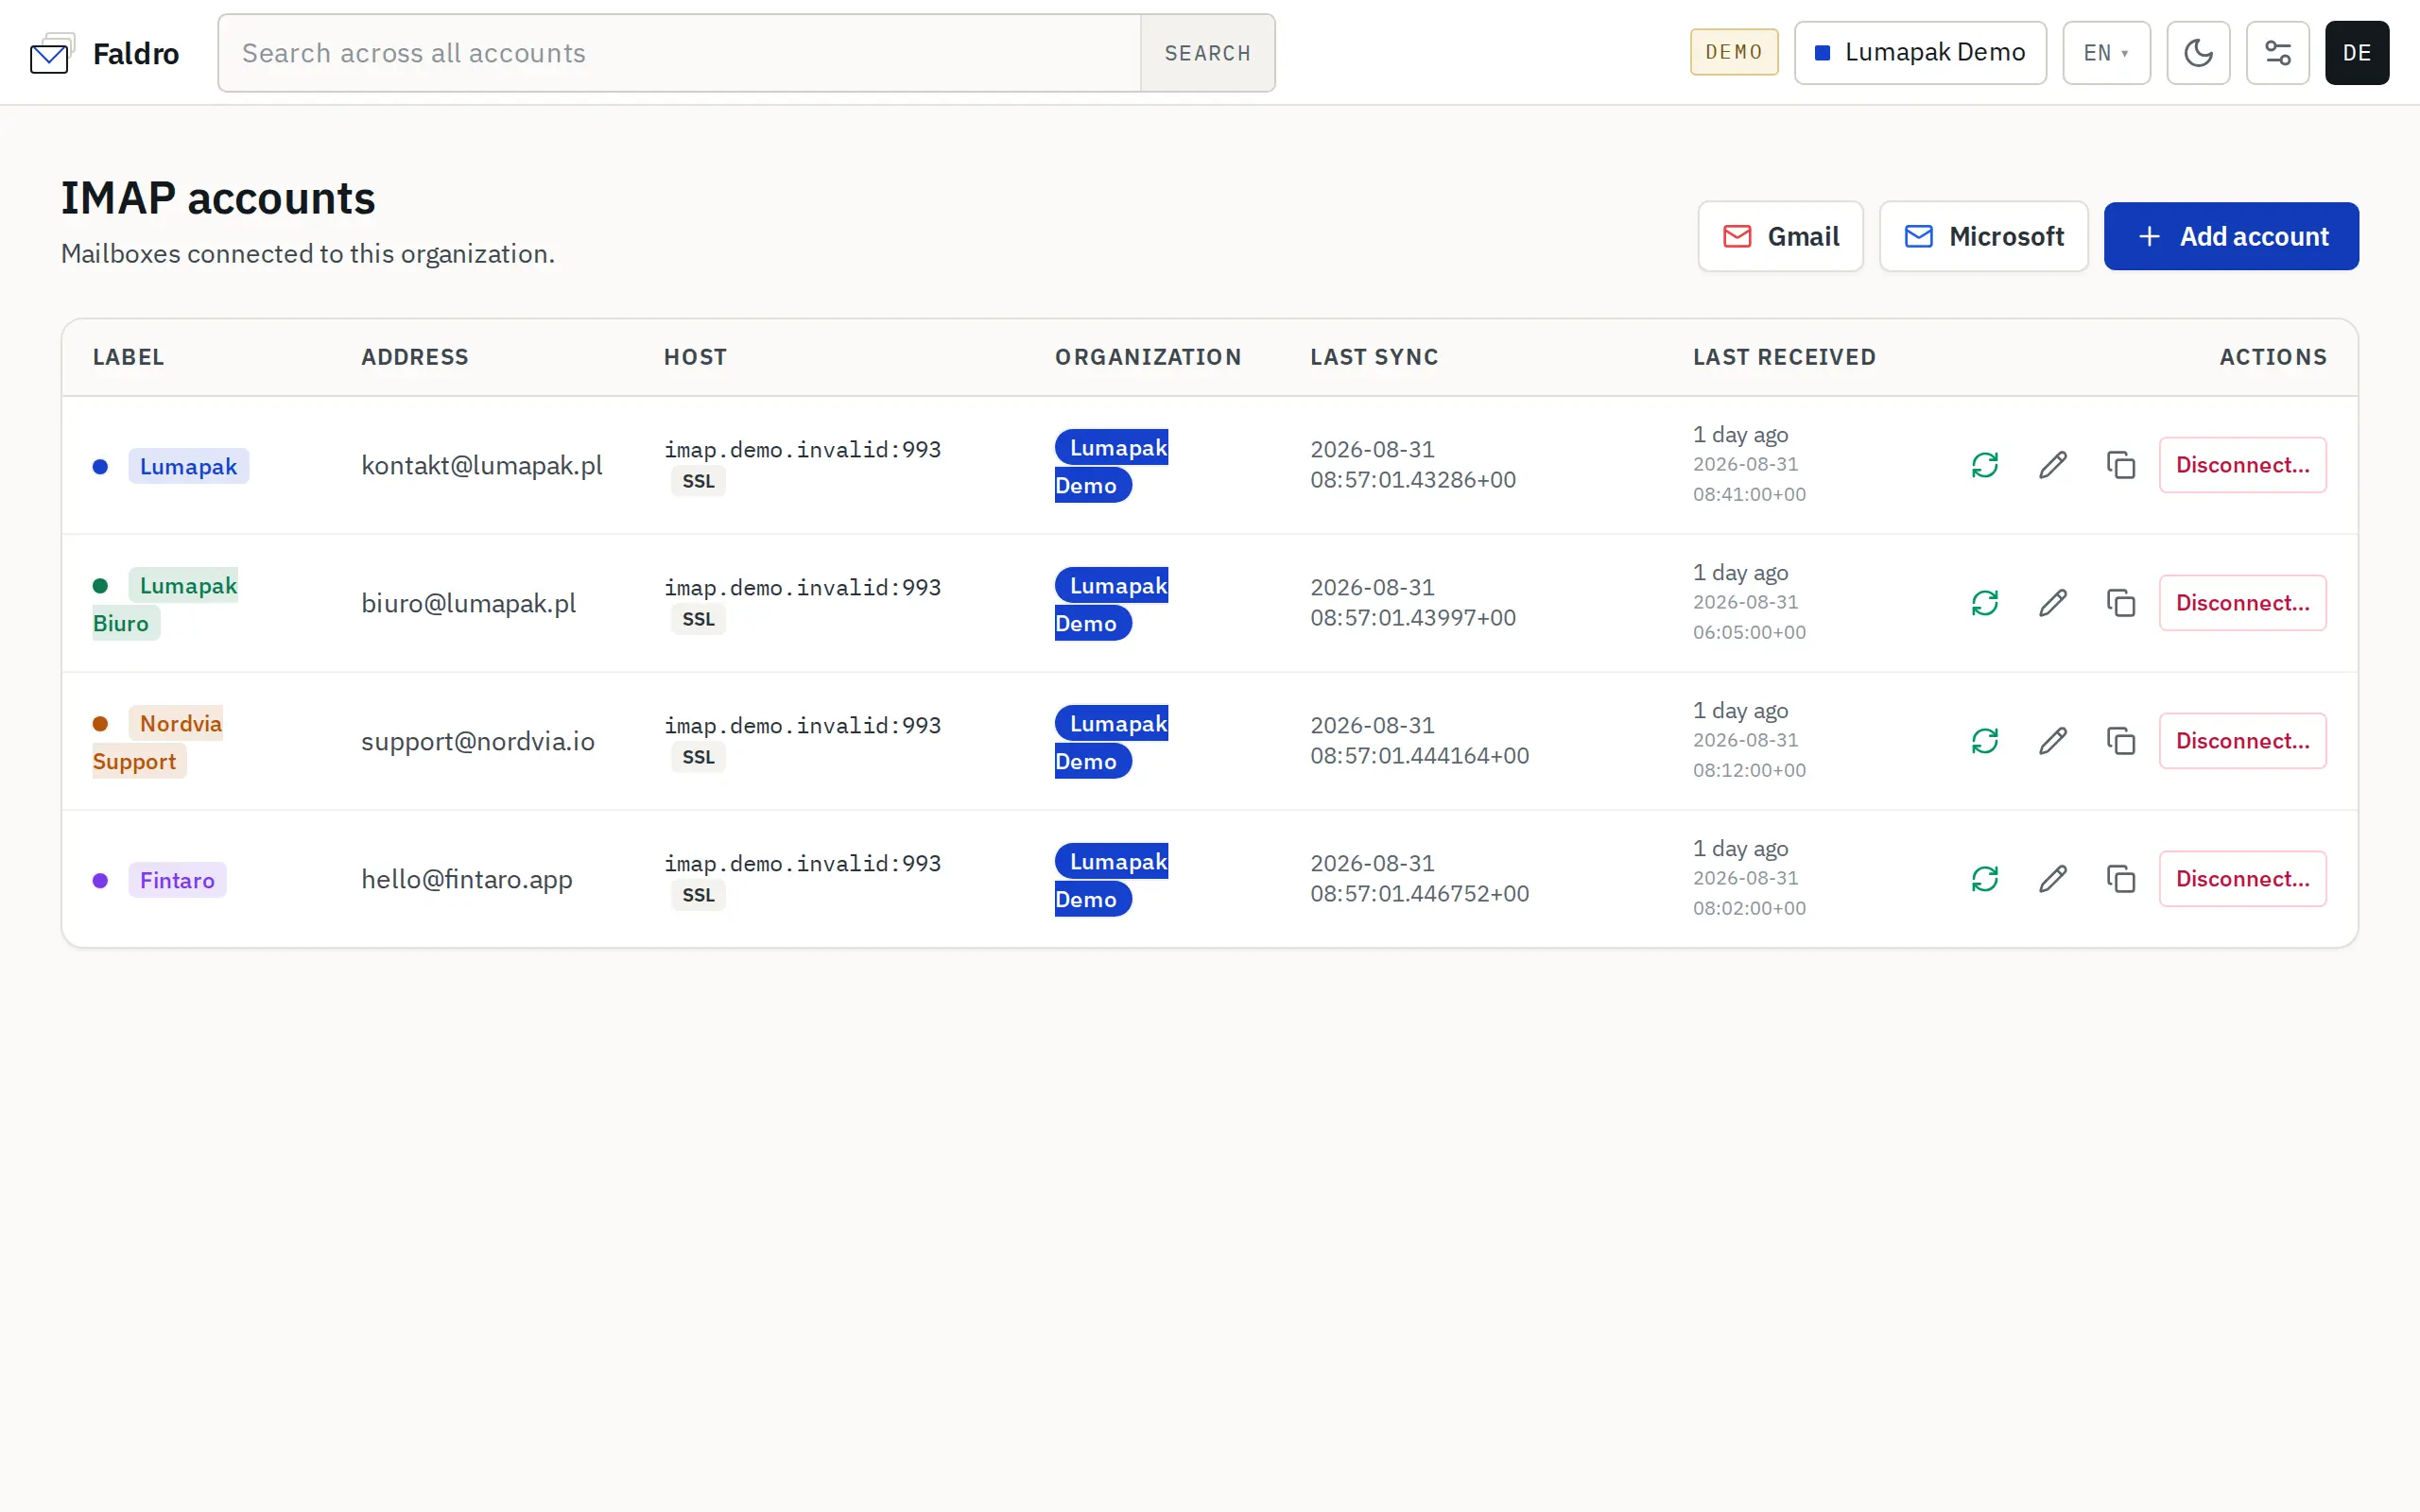
You connect a mailbox in Settings → Mail accounts → Add account. You need the e-mail address and its password; Faldro detects the server settings automatically in most cases.
Step 1. Address and settings detection
Enter the e-mail address and click Detect settings. Faldro checks, in order: the configuration published by the provider (autoconfig), its own list of popular providers, and finally the server ports. The result fills in the incoming and outgoing server fields. If nothing is found, enter them manually — you'll find them in the provider's panel, under "mail programs" or "IMAP/SMTP".
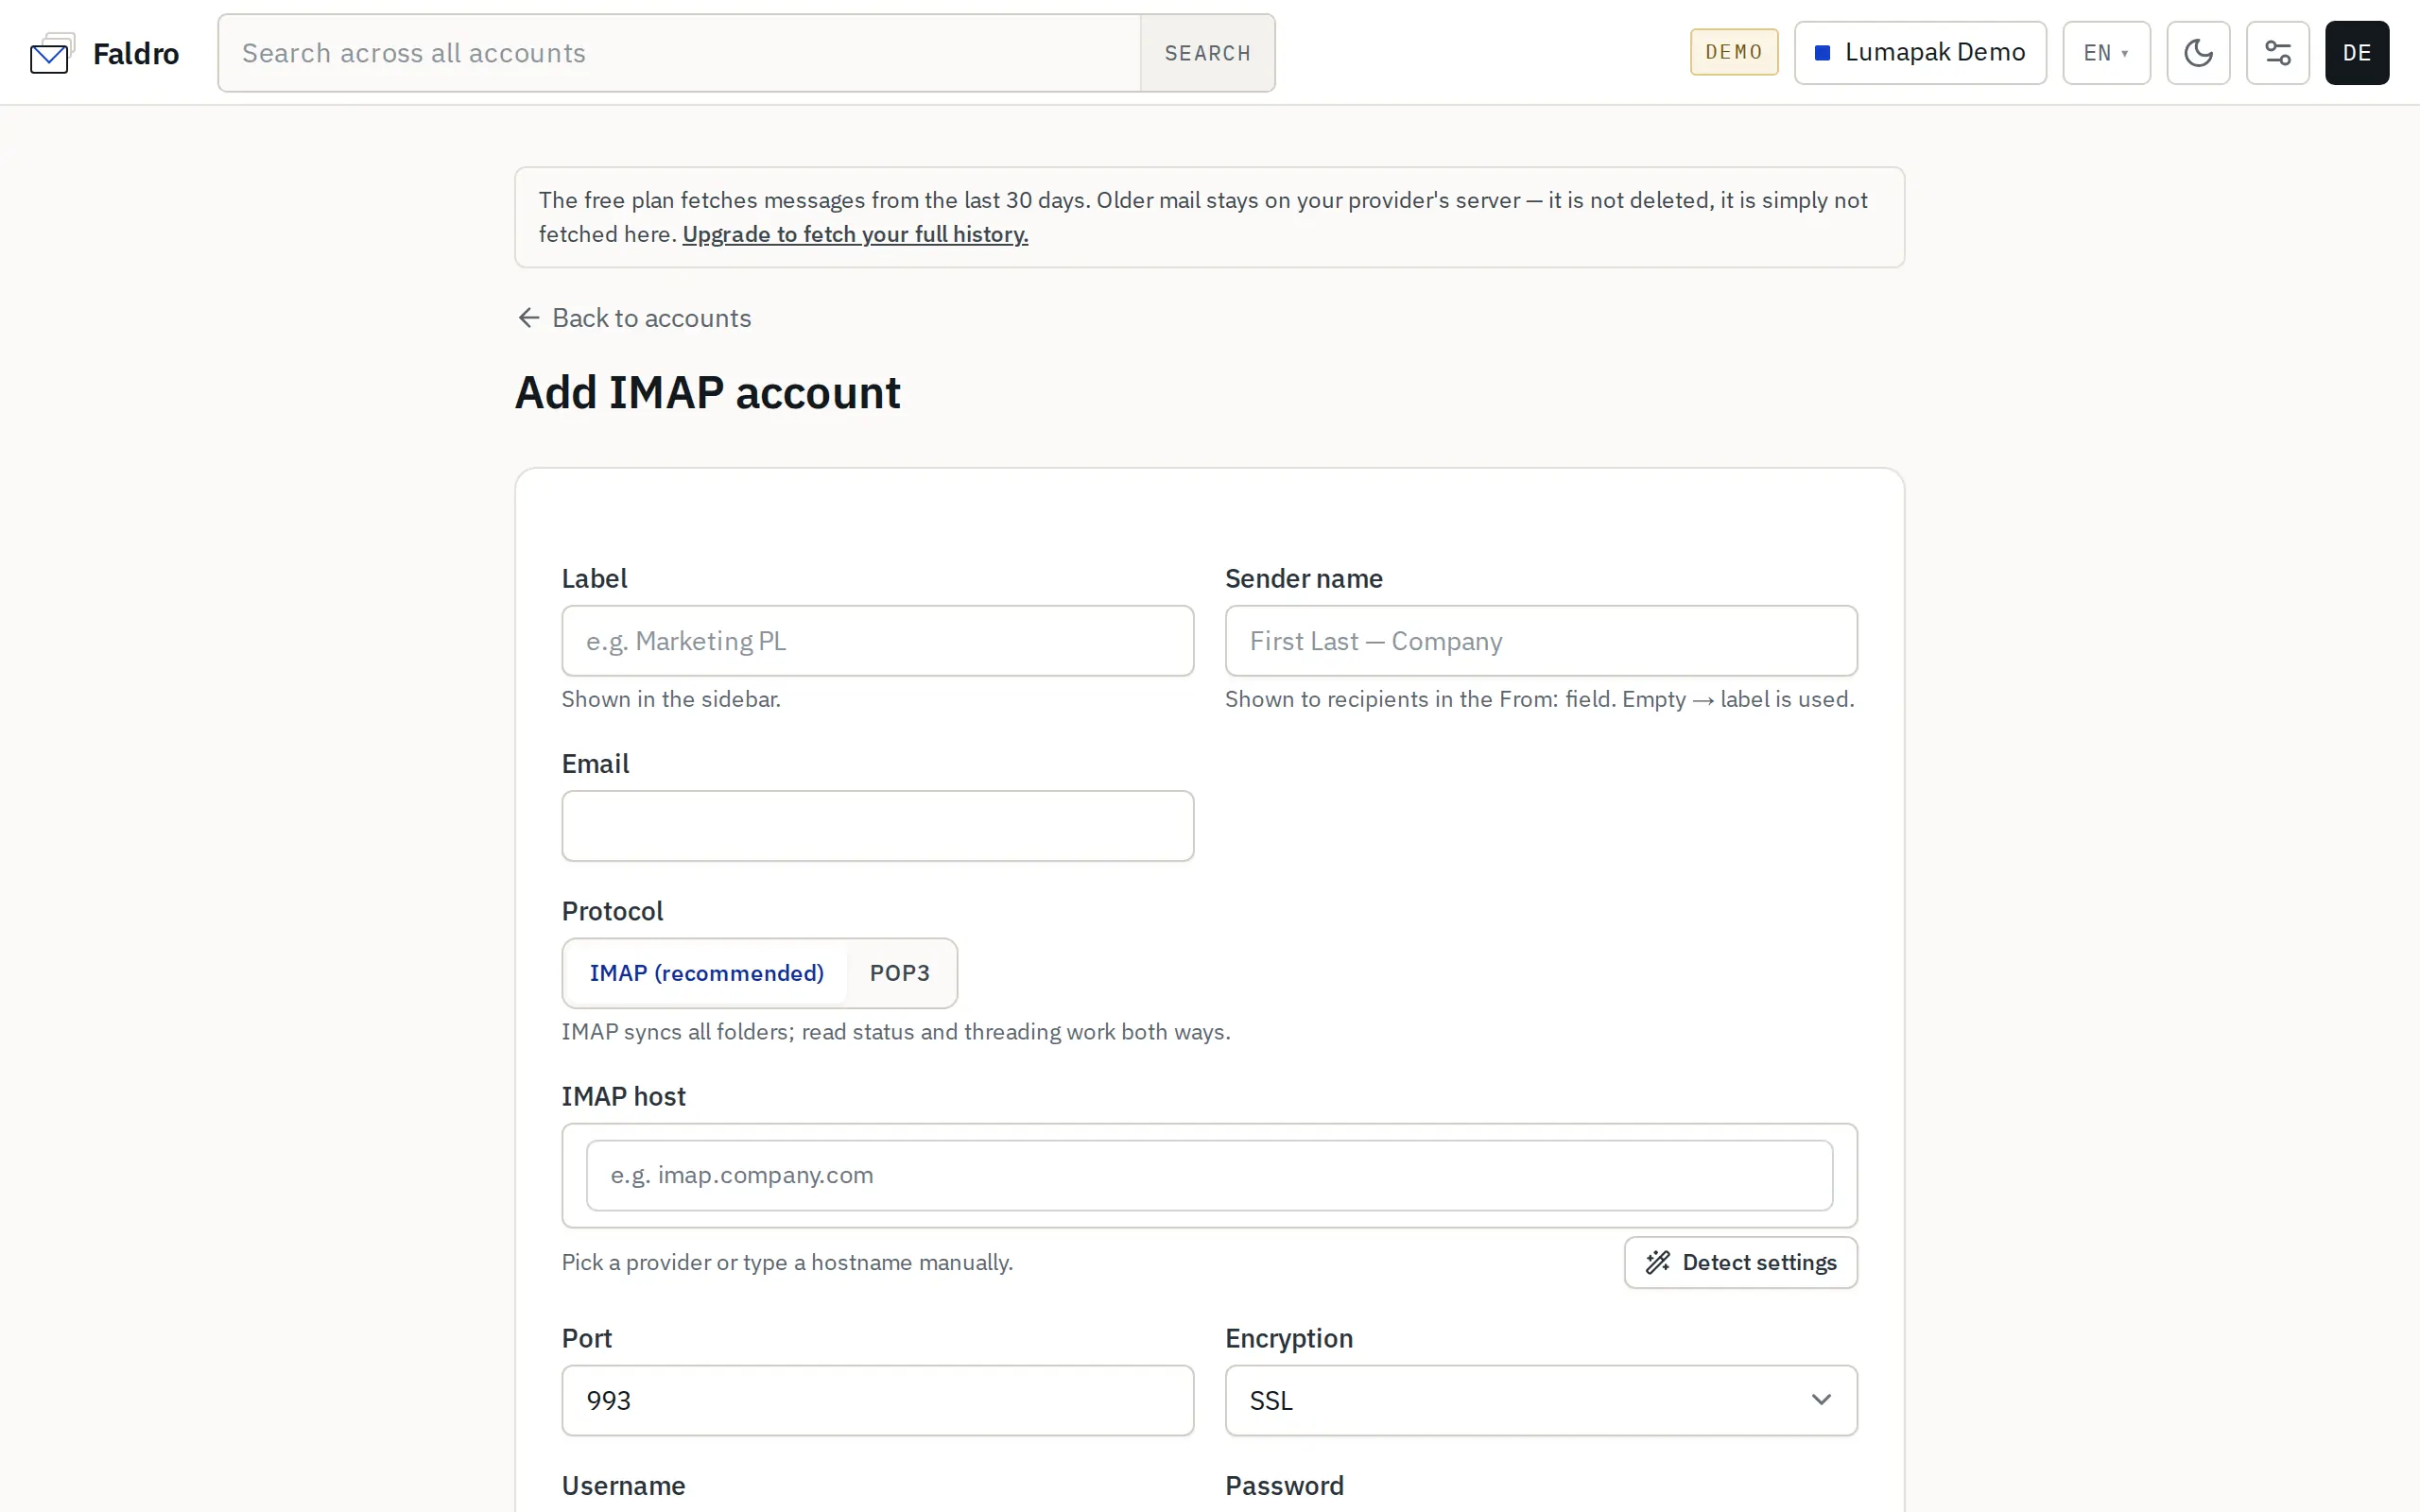
Form fields:
| Field | Meaning |
|---|---|
| List name | How the mailbox is labelled in the left sidebar, e.g. "Office". |
| Colour | The dot that marks the mailbox in the list and in threads. |
| E-mail address, sender name | What the recipient sees in the "From" field. |
| Protocol | IMAP (recommended — folders and flags sync both ways) or POP3. |
| Incoming server | Host, port, encryption (SSL/TLS or STARTTLS), login, password, certificate checking. |
| Outgoing server | Same, for SMTP. Leave the password blank to reuse the incoming one. |
| Sync priority | How often to fetch mail — see below. |
| Forward to | An optional address that receives a copy of new mail. |
Gmail, Yahoo, Apple, Fastmail, Zoho and some Polish providers don't accept a regular account password. You need to generate an app password in their settings and enter that instead. Microsoft 365 additionally requires the domain admin to enable "Authenticated SMTP". The form shows this hint when it recognises the provider.
Step 2. Connection test
Test connection connects to both the incoming and outgoing servers before anything is saved. If there's an error, you get a message translated into plain language (e.g. "port 465 requires SSL, and 587 requires STARTTLS") along with the server's literal response. See Help: sending fails for the list of messages and what to do about them.
Step 3. Save and confirm your identity
Saving an account touches credentials, so Faldro asks you to re-enter your Faldro password (not the mailbox password). This is a safeguard against a hijacked session — it also appears when editing or deleting an account, and when changing sender identities. Mailbox passwords are encrypted (AES-256-GCM) and never sent back to the browser.
Step 4. First sync
As soon as you save, the first fetch starts. The progress page shows folder by folder how many messages are already in. You can close it — syncing continues in the background, and new messages appear in the inbox without a refresh.
Sync priority
| Priority | When to use it |
|---|---|
| High | Support mailboxes where every minute counts. |
| Medium | Default for new accounts. |
| Low | Archives, addresses with rare mail. |
| Paused | The account stays, but nothing is fetched — e.g. while changing the password with the provider. |
Your plan may cap the highest available priority (after the trial ends without a subscription, "low" is enforced). Manual Sync now on the accounts list has an hourly limit that depends on your plan.
OAuth for Gmail and Microsoft 365
If OAuth login is configured on your installation, "Connect with Google" / "Connect with Microsoft" buttons appear on the accounts list. In that case you don't enter a password — the provider issues a token, and Faldro uses it for IMAP/SMTP (XOAUTH2). Without this configuration, the app-password route described above always works.
When a mailbox stops syncing
A rejected password stops fetching and shows a red banner on the accounts list with a Fix password button. Step-by-step instructions: Help: server rejects the password.
Did not find the answer?
Check the help section with typical problems or write to us — we reply on working days.